

I Bought a Circular Saw and Declared Myself a Woodworker
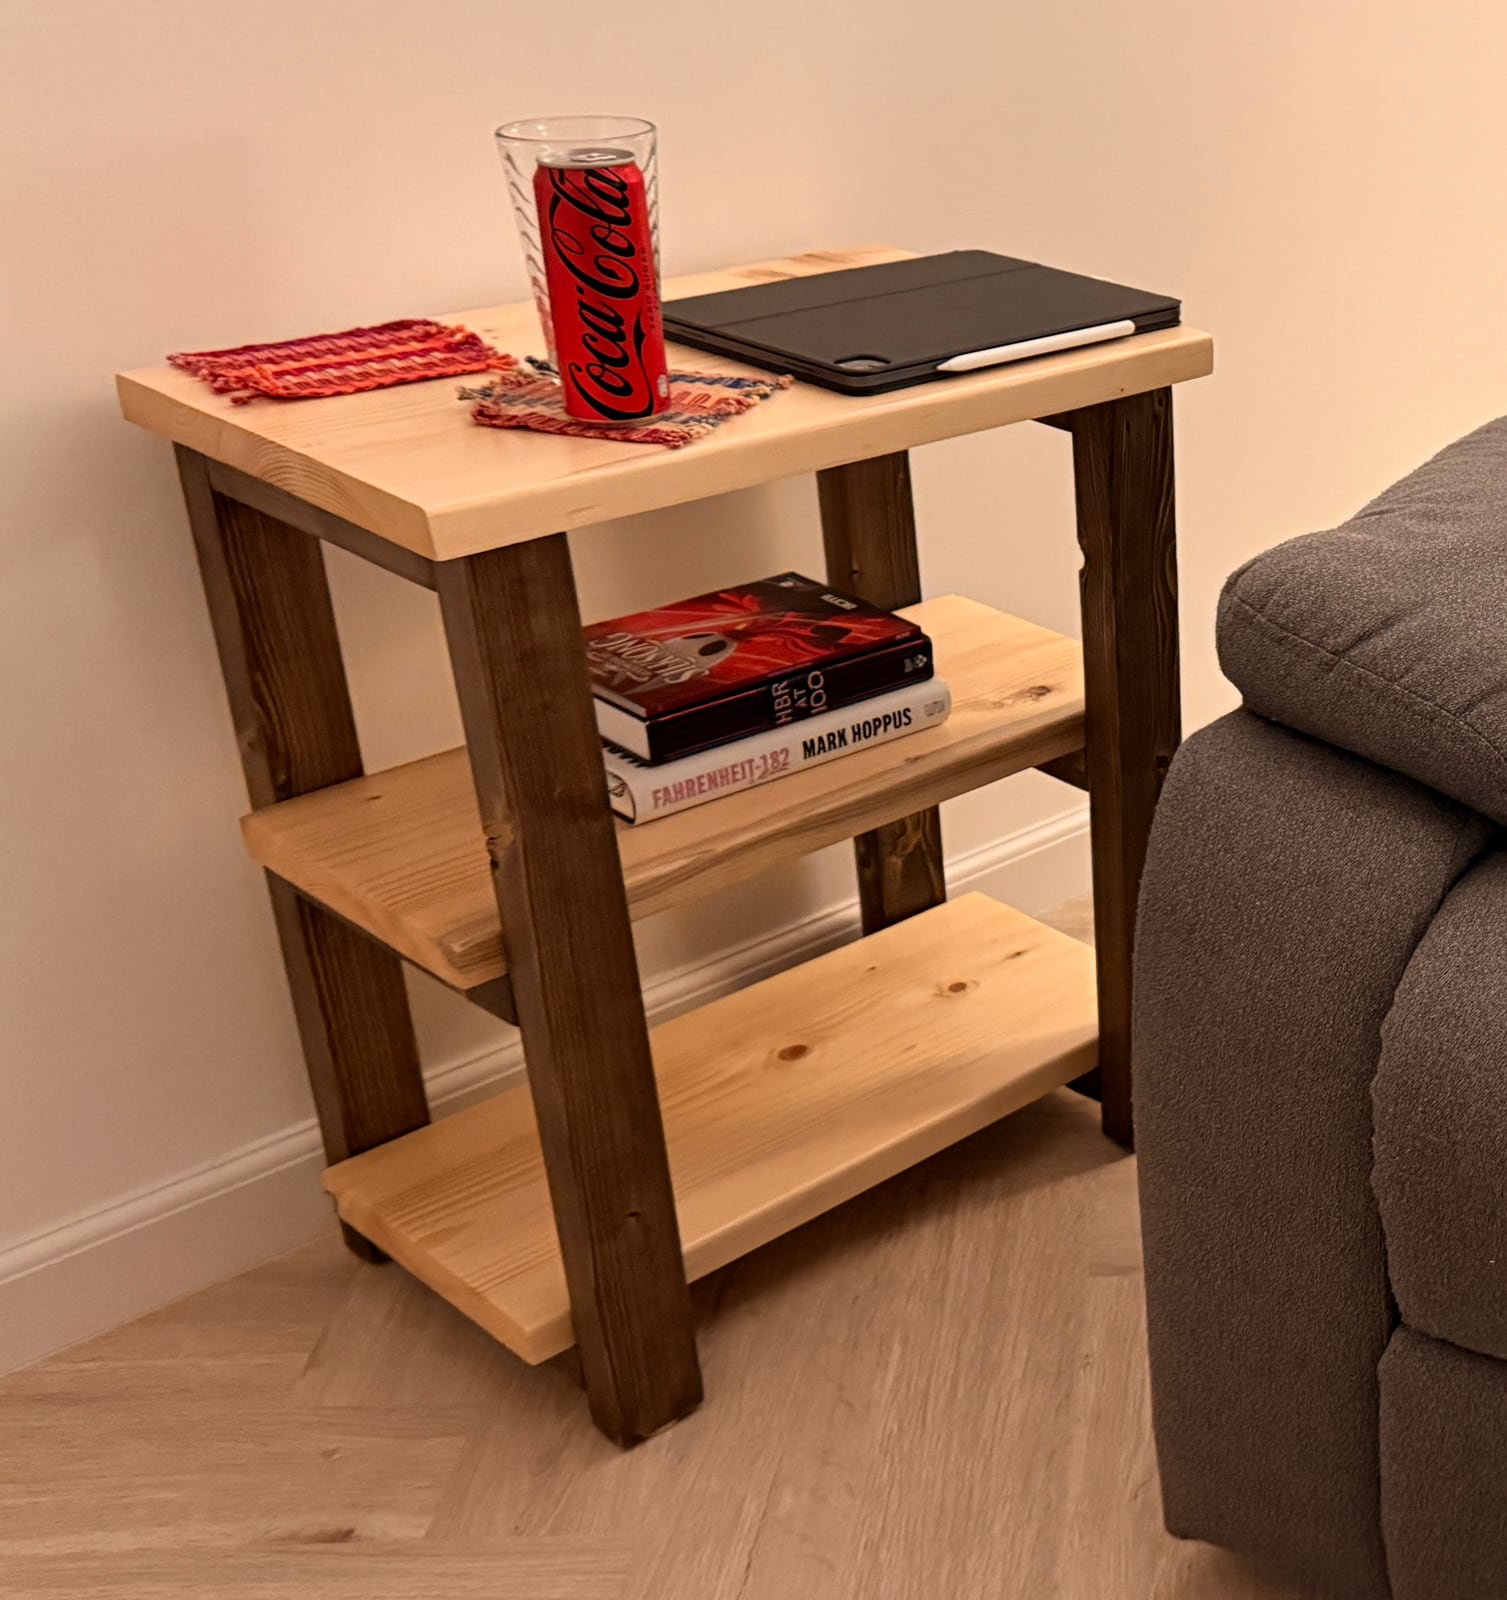
At this point I just knew I wanted to get into woodworking. It's a good hobby, it keeps your hands busy, and it's a lot better for you than doomscrolling or another night of video games. The problem was that all of it was completely overwhelming.
Nobody warns you that every saw seems to do exactly one kind of cut, which feels very limiting. Want to make one of those cutting boards you see on YouTube? Great. You'll need a table saw. And a planer. And something called a router — not the Wi-Fi kind. So I looked into routers, and it turns out the router is just the beginning: it needs bits, and if you want the good bits, they're expensive. Every tool I researched came with two more tools attached, like some kind of woodworking pyramid scheme.
In the end I did what 731 Woodworks tells beginners to do, and bought a circular saw (a Makita HS7010), some clamps and a random orbital sander (a DeWalt DWE6423). Three tools.
I'm a woodworker now.
The project: somewhere to put my drink
I found this one on Pinterest: an easy side table, a top and two shelves, to keep next to where I sit at night to watch TV. Until then my drink had been living on the floor, one careless foot away from disaster. This was perfect.
It looked easy enough, and the guide was very detailed about what the maker did at every step. (The link to that guide seems to be broken now, so this is your guide instead. Sorry.)
Buying lumber, or: was I ripped off?
So off I went to the store to buy some "dimensional lumber", which is a very official-sounding name for wood.
First surprise: I don't live in the US, and it turns out that matters. In the US, apparently, you walk in and get these perfectly square boards — S4S, surfaced on four sides, a term I only learned later. My store carried something decent enough. Close enough.
Second surprise: the price. All those "build your own shelves for cheap!" videos talk about pine like it grows on trees. Which, to be fair, it does — just not here. In the Middle East it's many times more expensive. It's a desert, after all. I guess all of it has to be imported.
Anyway.
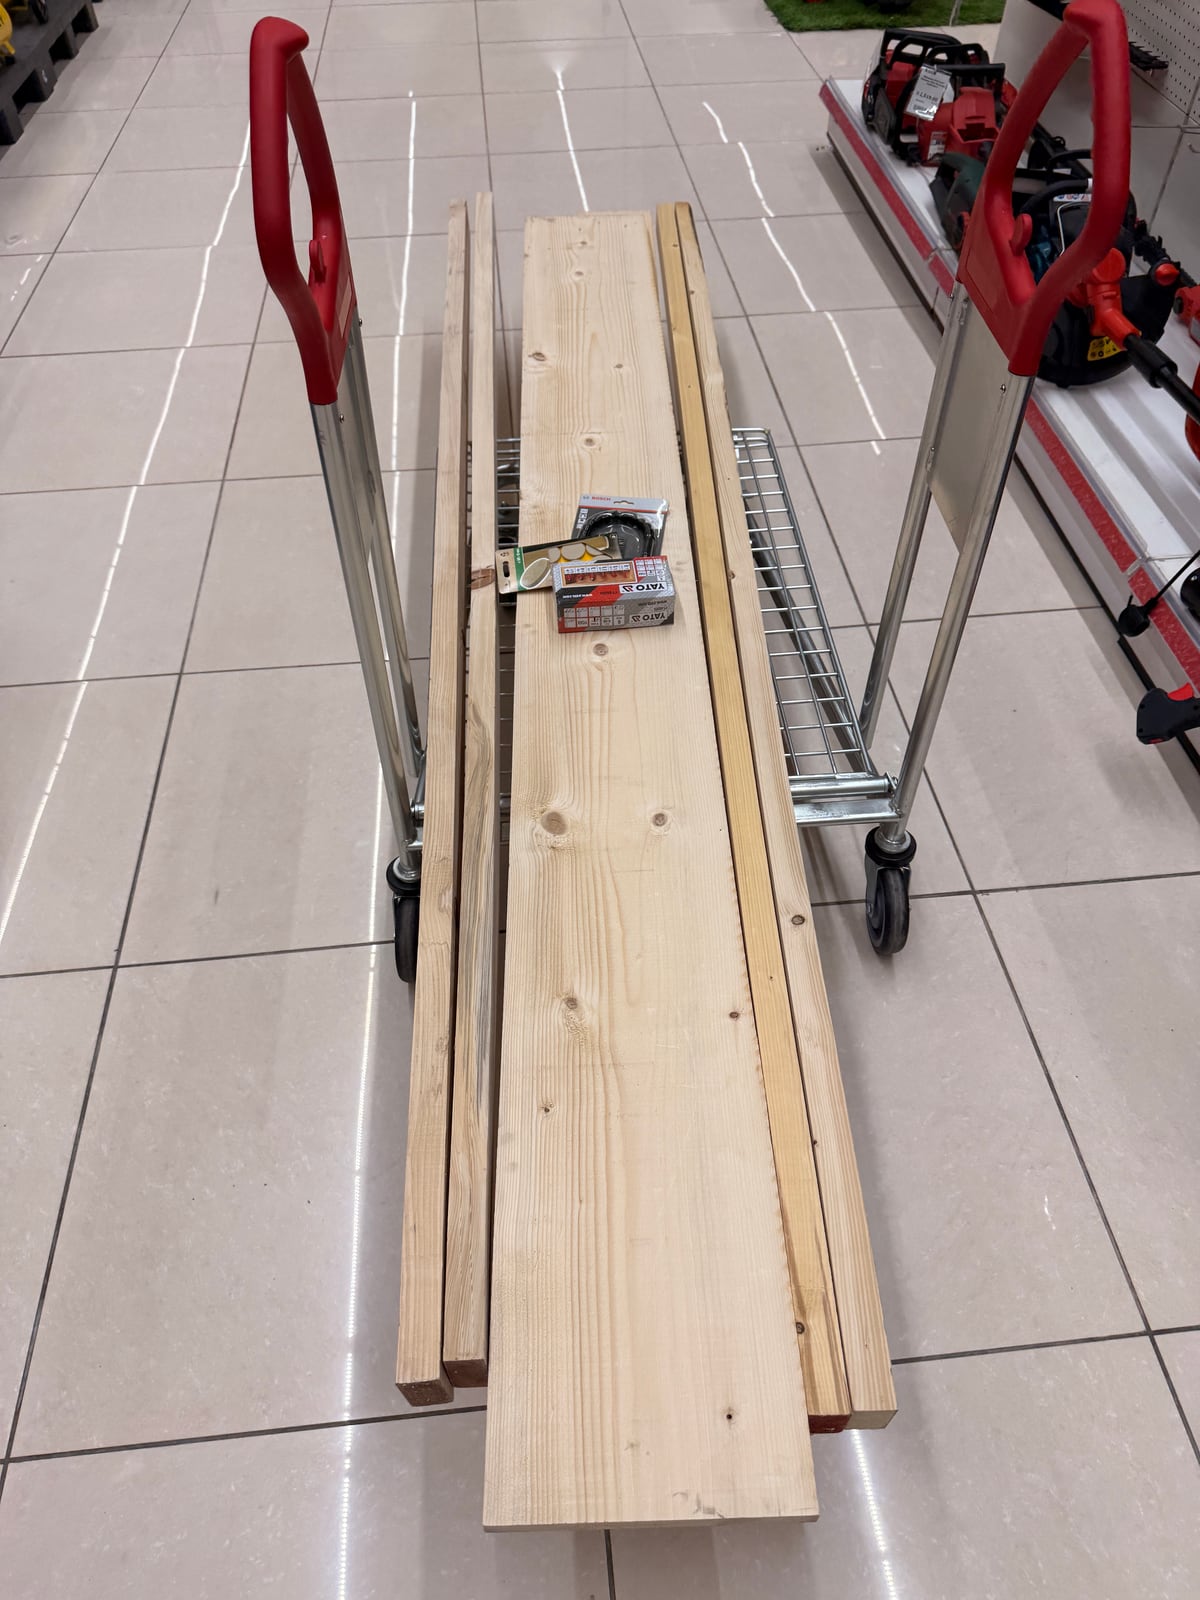
Lumber, in a trolley, in a desert.
No turning back now: too much money invested. I had the parts list from the guide, so I bought 2x3s for the legs (they didn't have 2x2s, and I wanted the legs square, but 2x3 would do), 2x8 for the two bottom shelves, and a 2x10 for the top. The top was wider than either board on its own, so it would be the 2x10 and a 2x8 glued together side by side. One glue-up, total. A nice, gentle first project.
And then I noticed something. They sold these to me as 2x3s. They are not two inches by three inches. They are, at best, a rumour of two by three. What the hell — was I ripped off?
The internet had to talk me down. Lumber is sold by its nominal size: roughly what the board measured when it was first sawn, before drying and planing shaved a bit off every side. Every 2x3 on the planet is smaller than its name. Everyone knows. Everyone's fine with it. Measure twice, cut once, they say. Nobody mentions that the first thing you'll measure is proof that the store has been lying to you, perfectly legally, for generations.
The world's cheapest workbench
In the store I also saw they sell their plywood offcuts for $4, and one of them had my name on it. Not for the side table. For the table I'd build the side table on.
The costs kept adding up, but I'd already spent a lot, and by then stopping felt like the expensive option. So I ordered two Amazon Basics sawhorses, put the offcut on top, and I had my table!
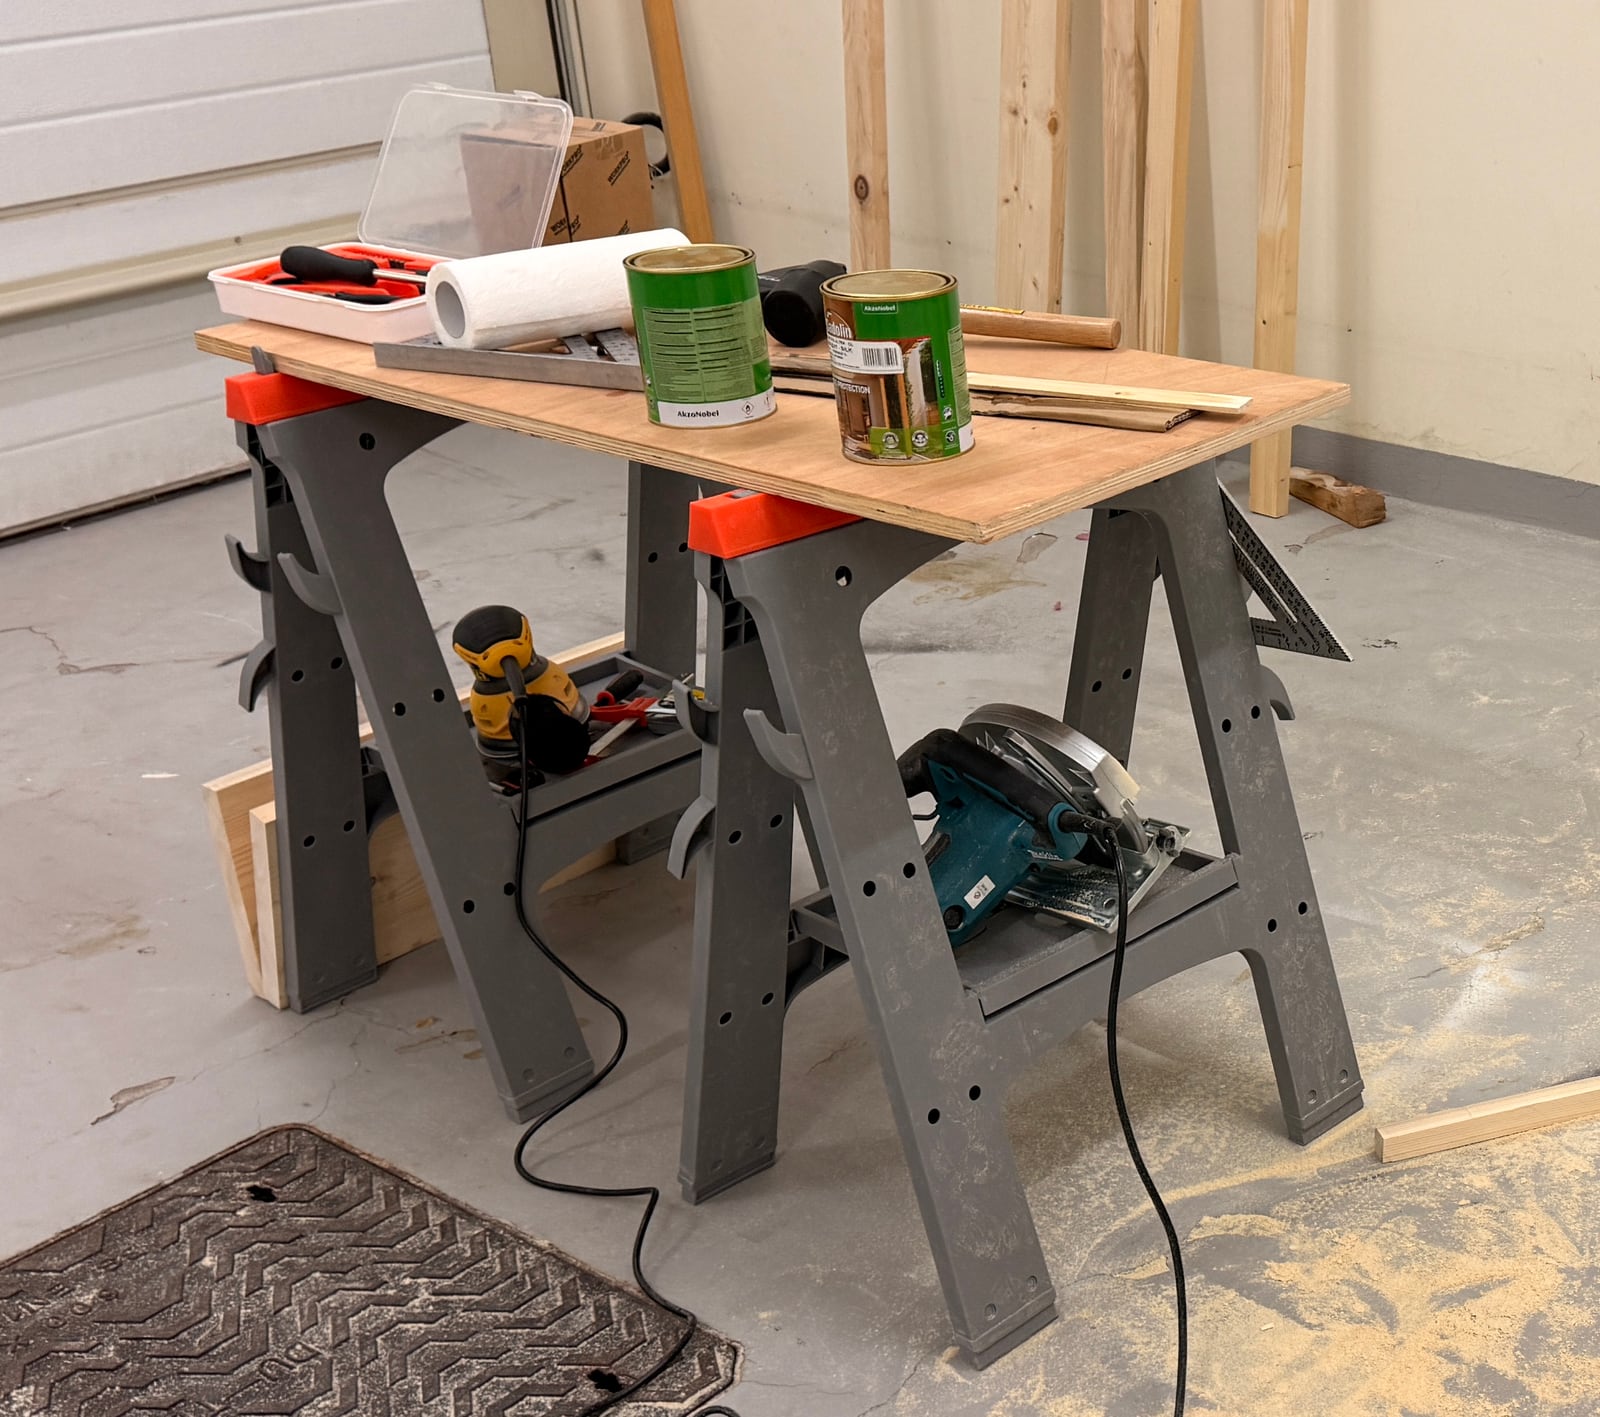
Two Amazon Basics sawhorses and a $4 plywood offcut. Workshop: established.
We're in business.
Learning to cut in a straight line
First up, the legs. I put a 2x3 on the table, picked up the circular saw, and immediately had a question I did not expect to have: how does one make a straight cut with this thing? It overwhelmed me.
Then the next lesson arrived. I let the board hang off the edge of the table, made my cut, and watched my fancy, freshly cut leg drop straight onto the floor. What am I supposed to do here? Catch it?
Anyway, lessons learned. Clamp the wood before you cut it. And a level makes a perfectly good straightedge to run the saw against — it just takes 27 cuts to get used to. After that it's simple enough. After 27 cuts, most things are.
Support matters more than it looks. Keep the piece you want on the table, clamped, and let the waste be what hangs off. On longer cuts, support the board close to the cut on both sides so neither half can sag: a board held only at its ends sags into the cut, pinches the blade, and a pinched circular saw is how kickback happens.
The glue-up I didn't think about
Once I had some confidence with the saw, I cut the two boards for the top and glued the 2x10 to the 2x8 to make a "2x18". (Nominally. By now I knew better than to trust a number on a board.) It was simple enough. I didn't overthink it — I watched what people did on YouTube and did that.
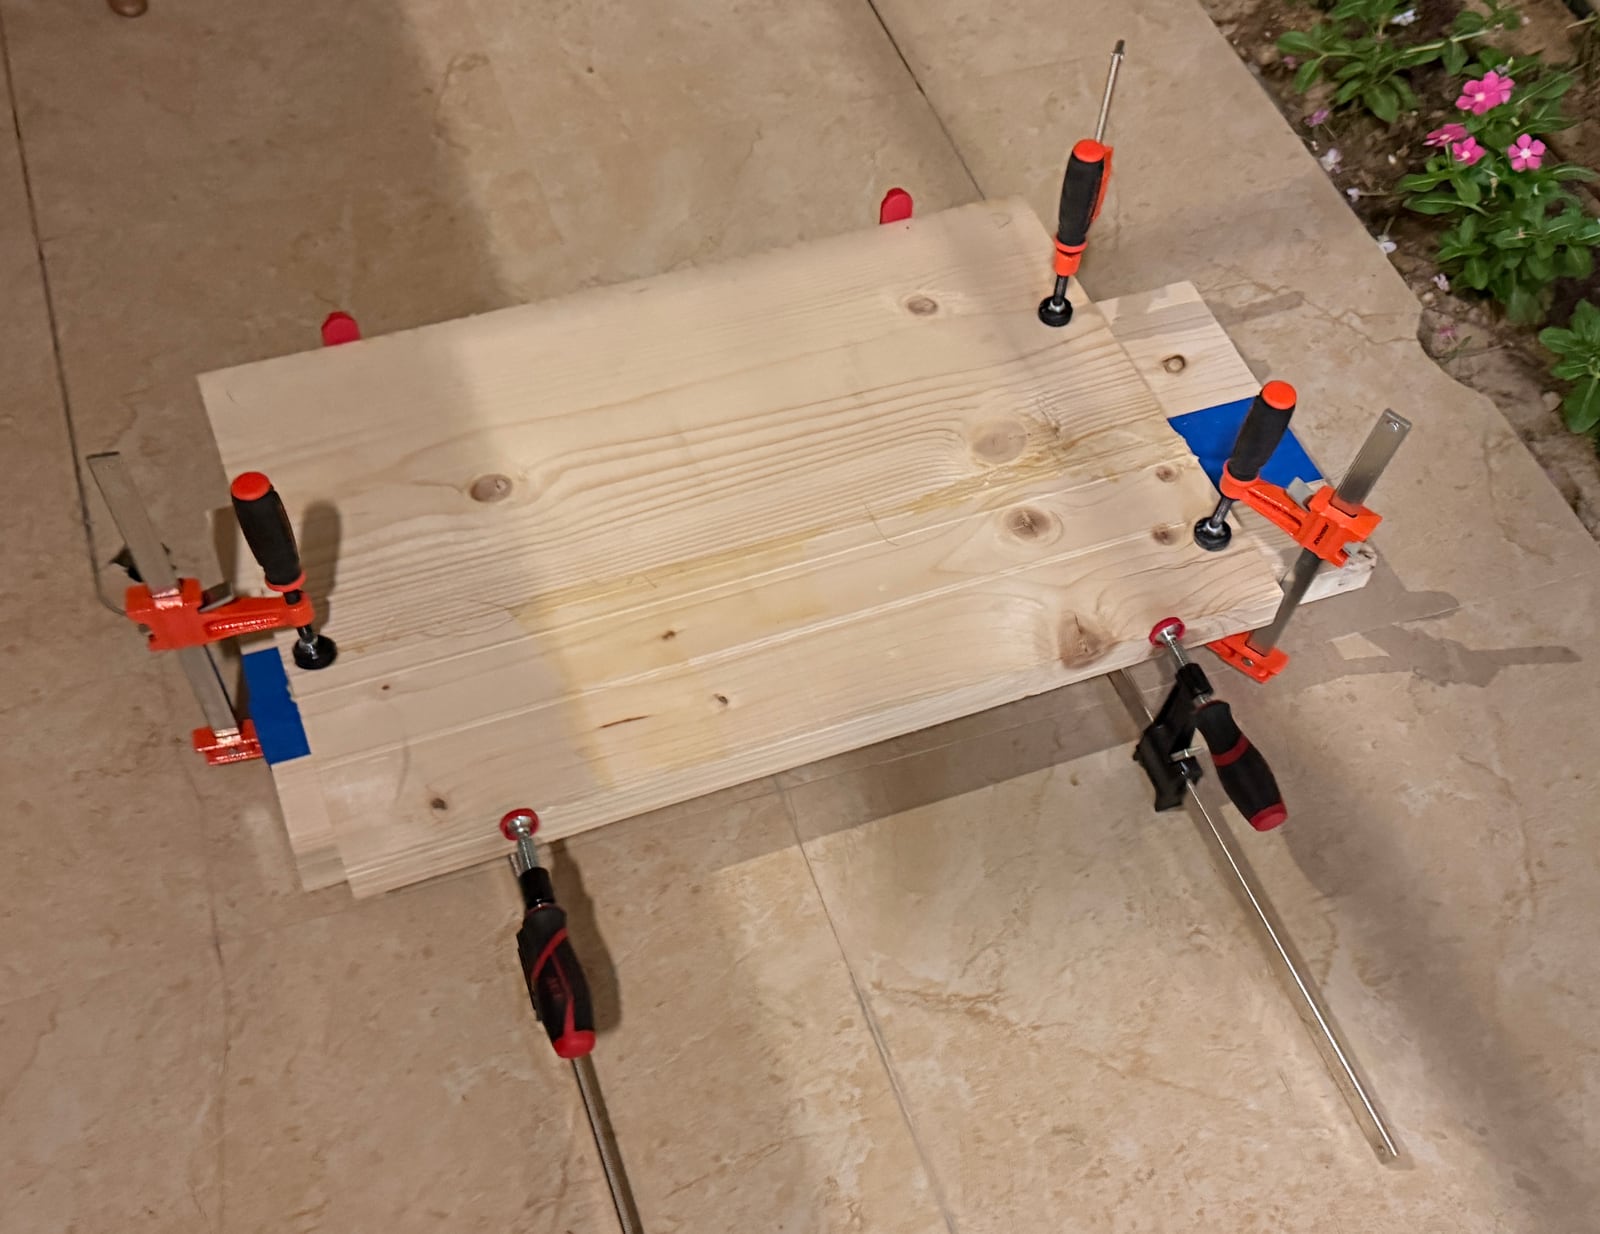
One glue-up. Zero cauls. Maximum confidence.
Looking back, it's a miracle it came out okay. Just F-clamps on pine. No cauls. No clamps alternating top and bottom to keep the panel from bowing. Nothing. Just raw circular-saw cuts, some clamps, and Titebond II, picked for the very scientific reason that it was the one I kept seeing online.
Stain, finish, and a graveyard of brushes
While the glue dried, I started thinking ahead. I knew I'd need pocket holes, and I knew I wanted to stain the wood.
The staining turned out to be the easy part, mostly because I outsourced the thinking. I went to Ace Hardware, found a guy, and asked him how to get the two colours I wanted. He handed me two products — one stain, and one finish that darkens the colour slightly — and that was that.
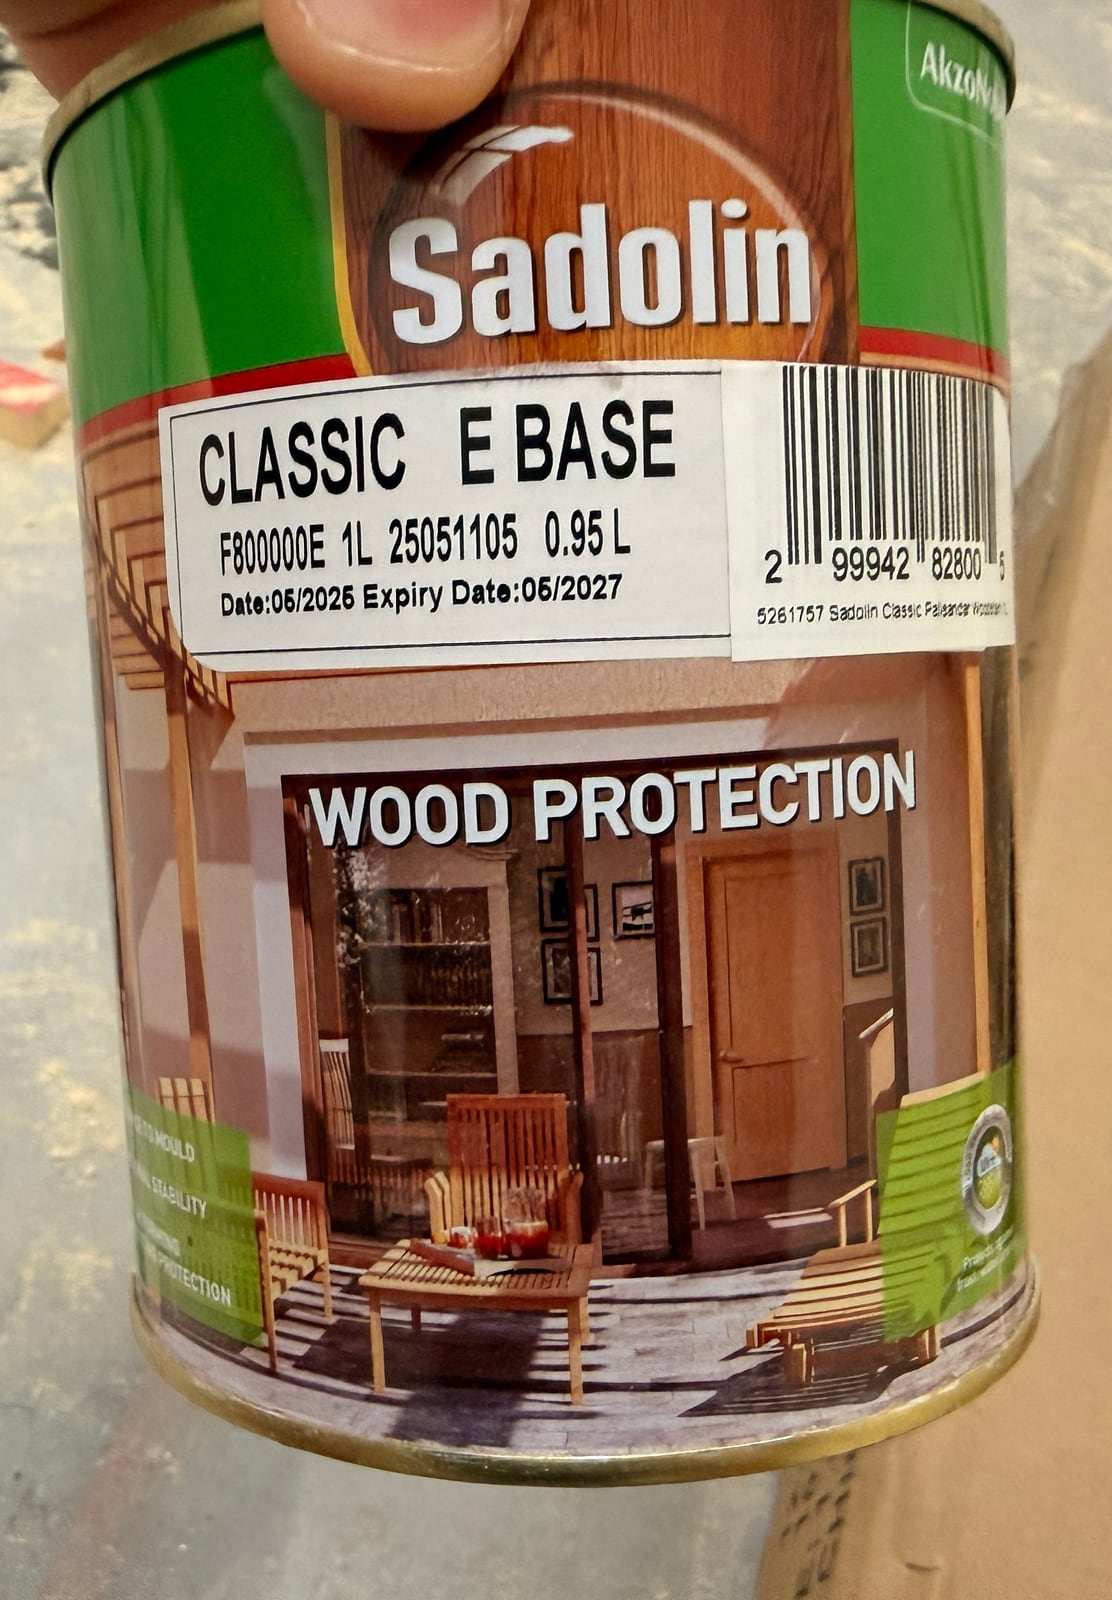
Product one: the stain.
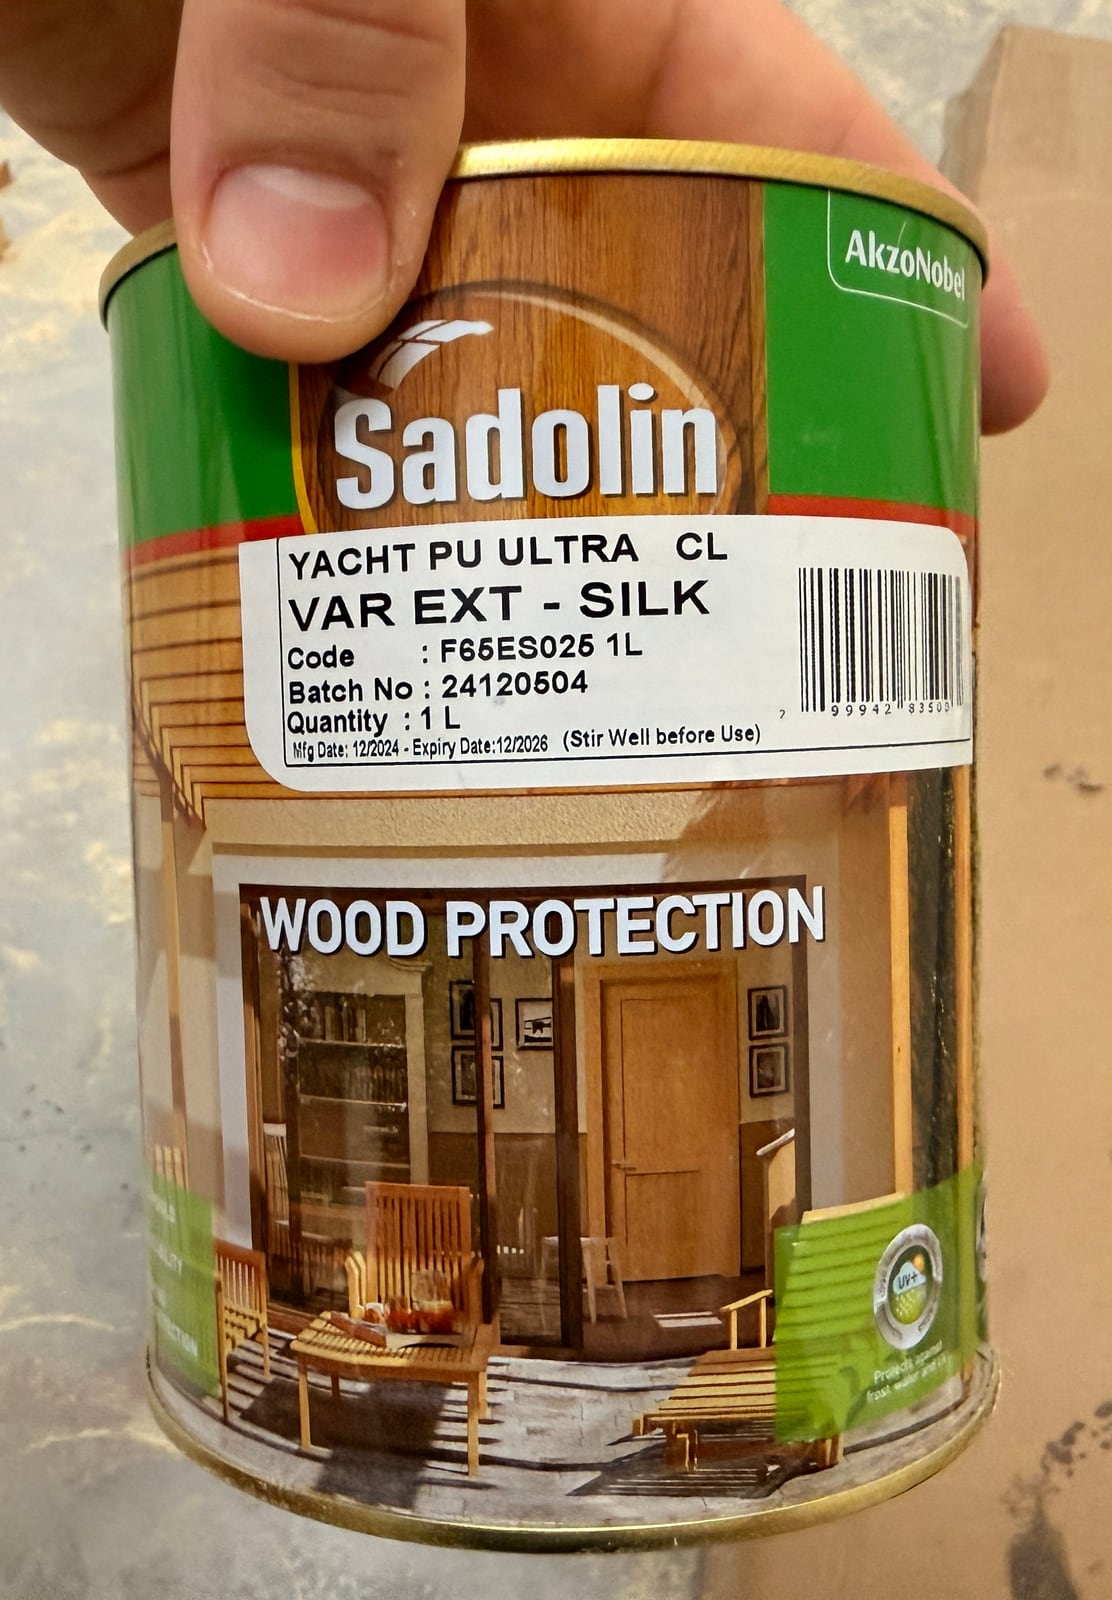
Product two: the finish. Technically a yacht varnish, so the side table is also seaworthy.
I decided to trust the process. If I tried to micromanage every part of my first project I'd get overwhelmed, so I focused on just getting it done. I tested both products on some 2x3 offcuts and left them to dry.
What a mess. I don't know how to clean a brush, so I made an executive decision: buy a ton of cheap ones and treat them as disposable. (Don't judge.)
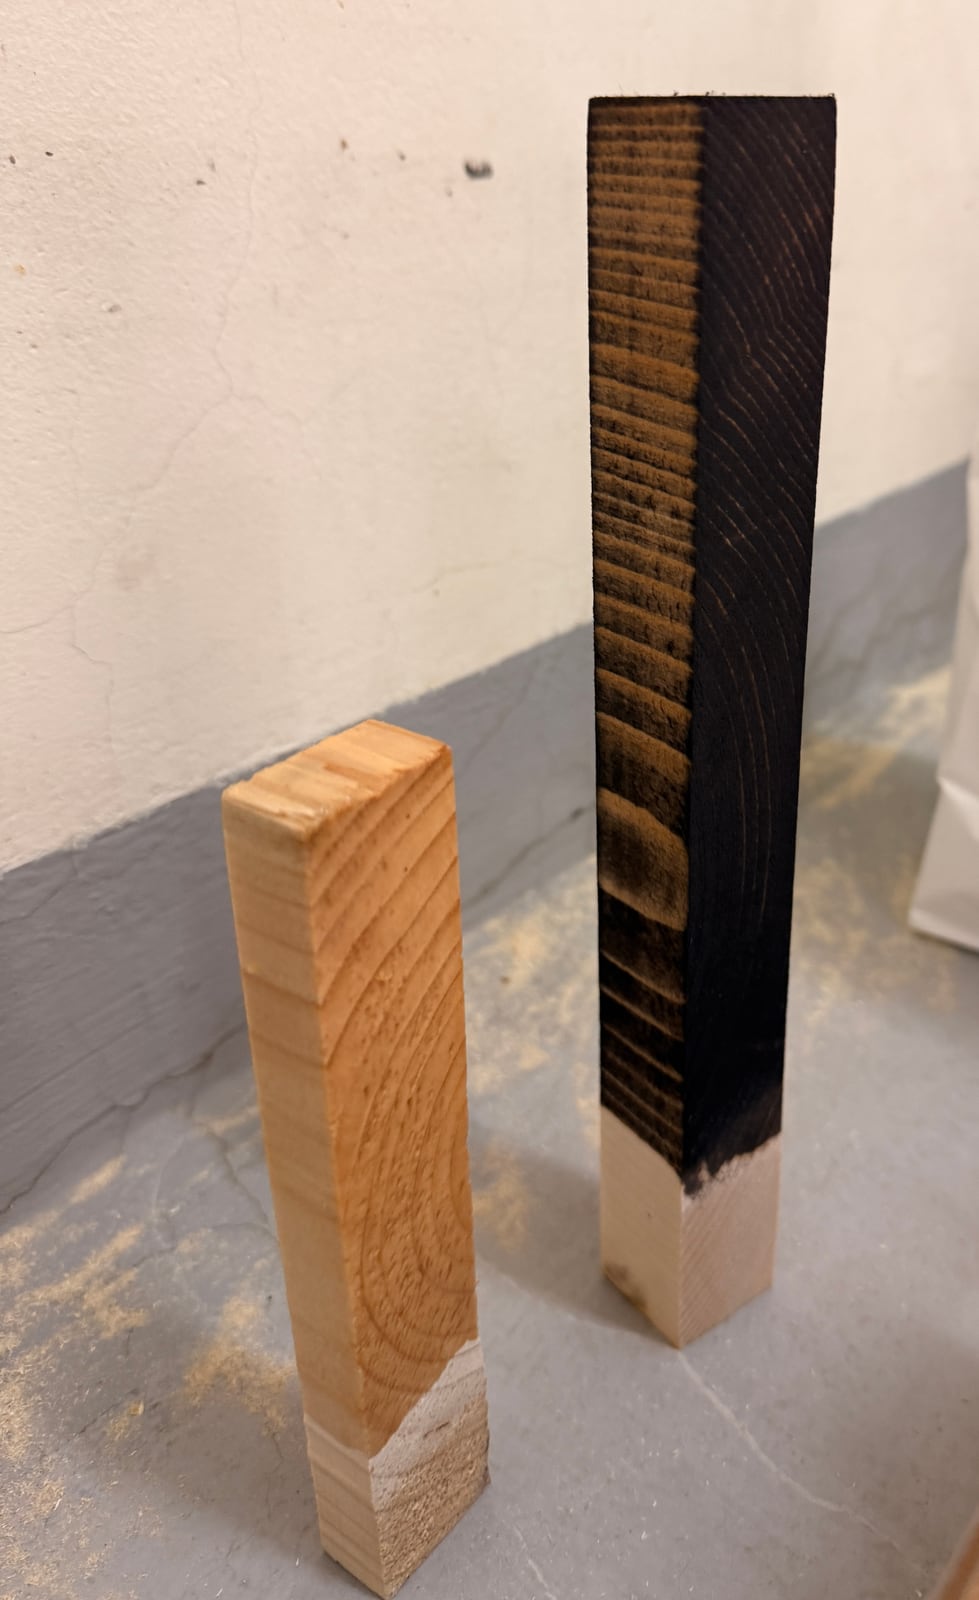
Test pieces. The bare ends are the "before" photo.
Pocket holes, or: is something burning?
Then, the pocket holes.
It turns out "pocket holes" are not something you can buy at Ace Hardware. You need a pocket hole jig, and every jig YouTube recommended was expensive. Another tool that needs another purchase — the pyramid scheme strikes again. I found the Milescraft PocketJig200 kit on sale online and ordered it.
"Do some test holes before you go at the real thing," everyone said. So I did. I dug out the drill I'd had at home for years, fitted the pocket hole bit, deciphered the setup instructions, and started drilling...
Smoke started coming out.
The wood started burning.
Should I stop? But it's barely moved forward. No — maybe I'm just not pushing hard enough. Push harder. More smoke. What??
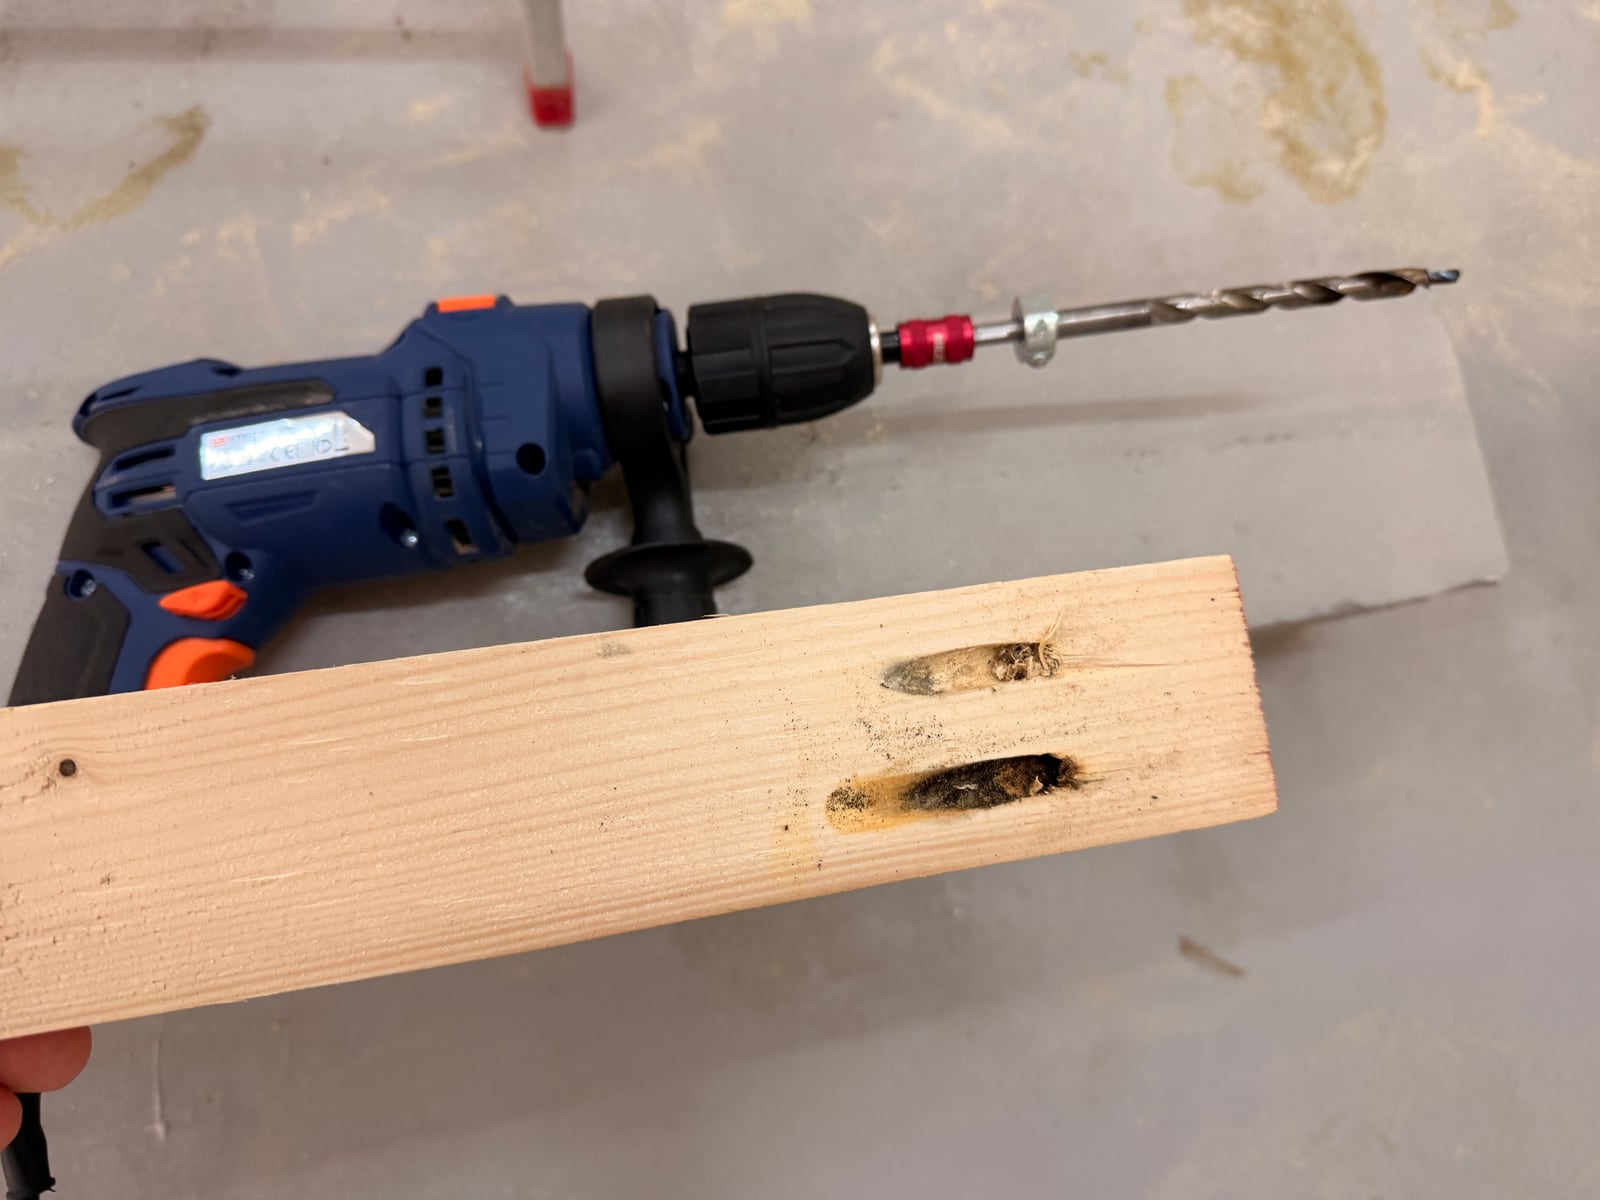
Test holes one and two. The scorch marks were free.
Man. First attempt, and I'd burned the wood — and probably heated the bit so much it was dull by now. Some checking online, and the verdict came back: wrong drill for the job. Too fast. I need a slower speed and more torque.
More money? Really?
Here's the thing, though: the glue-up had come out alright. Walking away now would mean wasting it. The sunk cost fallacy is a fallacy, sure. It's also an incredibly effective project manager. So I went deal hunting, and after a few store visits and a lot of online searching I got my hands on this very sexy DeWalt x McLaren F1 Team 18V XR Brushless Hammer Drill Driver (DCD85M).
Yes. I replaced a drill that was "too fast" with one named after a Formula 1 team.
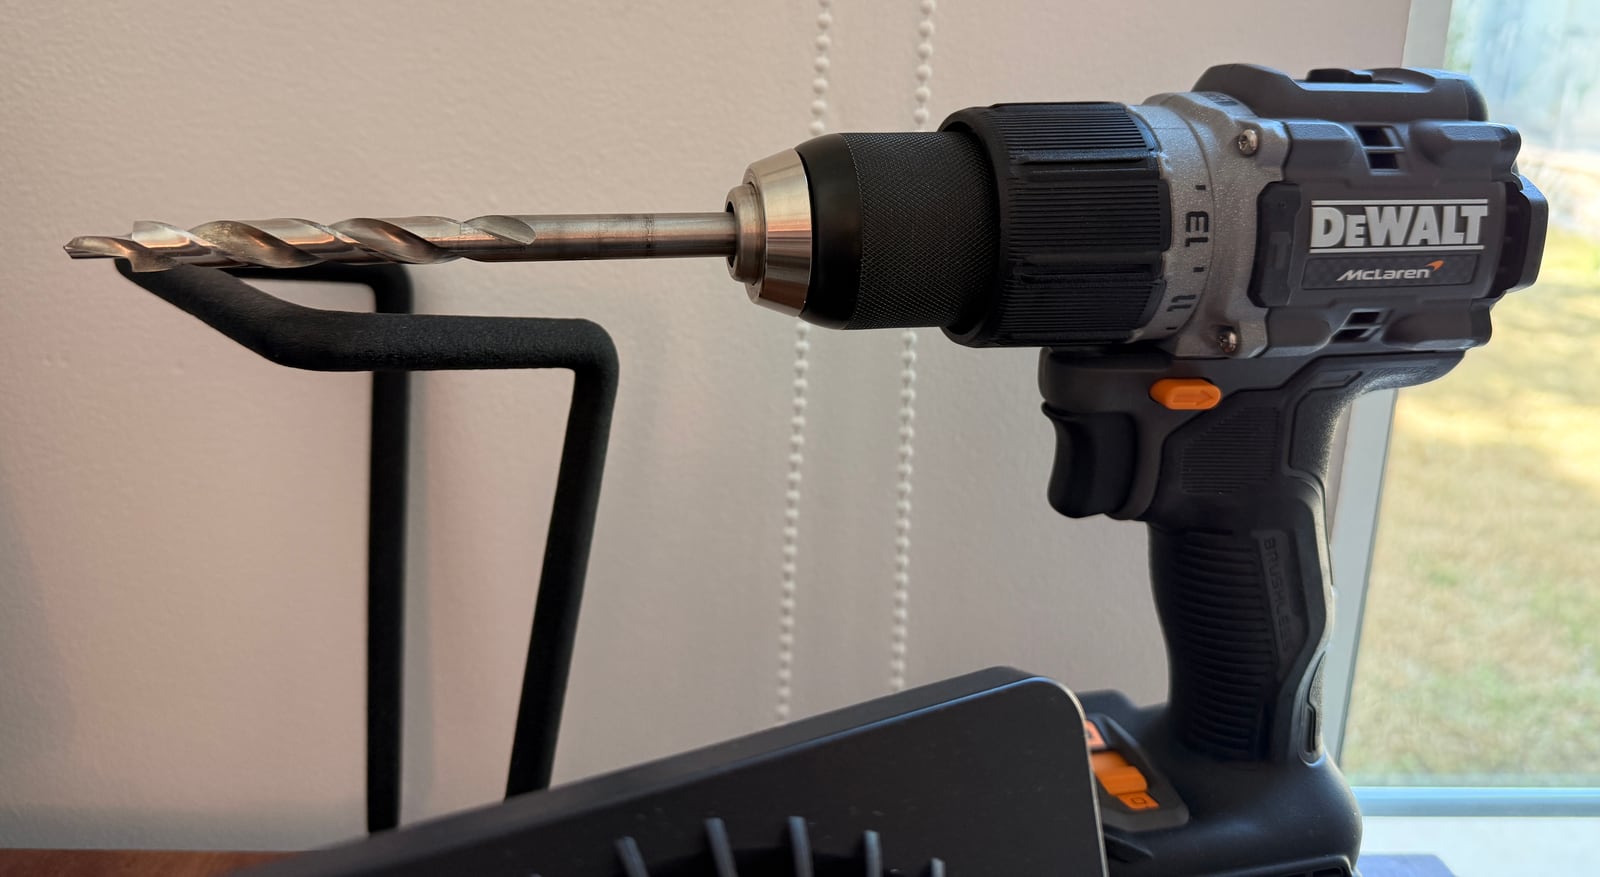
Too fast? Never heard of it.
I also bought a new bit, because at this point I was so frustrated I wasn't leaving anything to luck. New drill, more torque, the right pressure — and the holes came out beautifully.
About that smoke. Pocket hole bits are actually meant to run at high speed, so "too fast" usually isn't the culprit. Smoke with barely any progress tends to mean a dull bit, chips packing the hole (back the bit out once or twice on the way in to clear them), or a drill accidentally set to reverse. A drill that bogs down under load makes all of that worse — so the new one still earned its place.
(I wasn't planning on posting these builds back then, so there are fewer photos from this stretch than I'd like.)
This "pine" — I don't think it's actually pine; store "pine" is often spruce, pine or fir sold as one — seems to be much easier to work with than the walnut slabs I keep seeing online. I don't own a router, which is what people normally use to round over an edge, but I figured the sander and my cheap no-name sandpaper could manage. They actually came out great.
Time to put it all together and see if the parts actually fit.
It has a shape
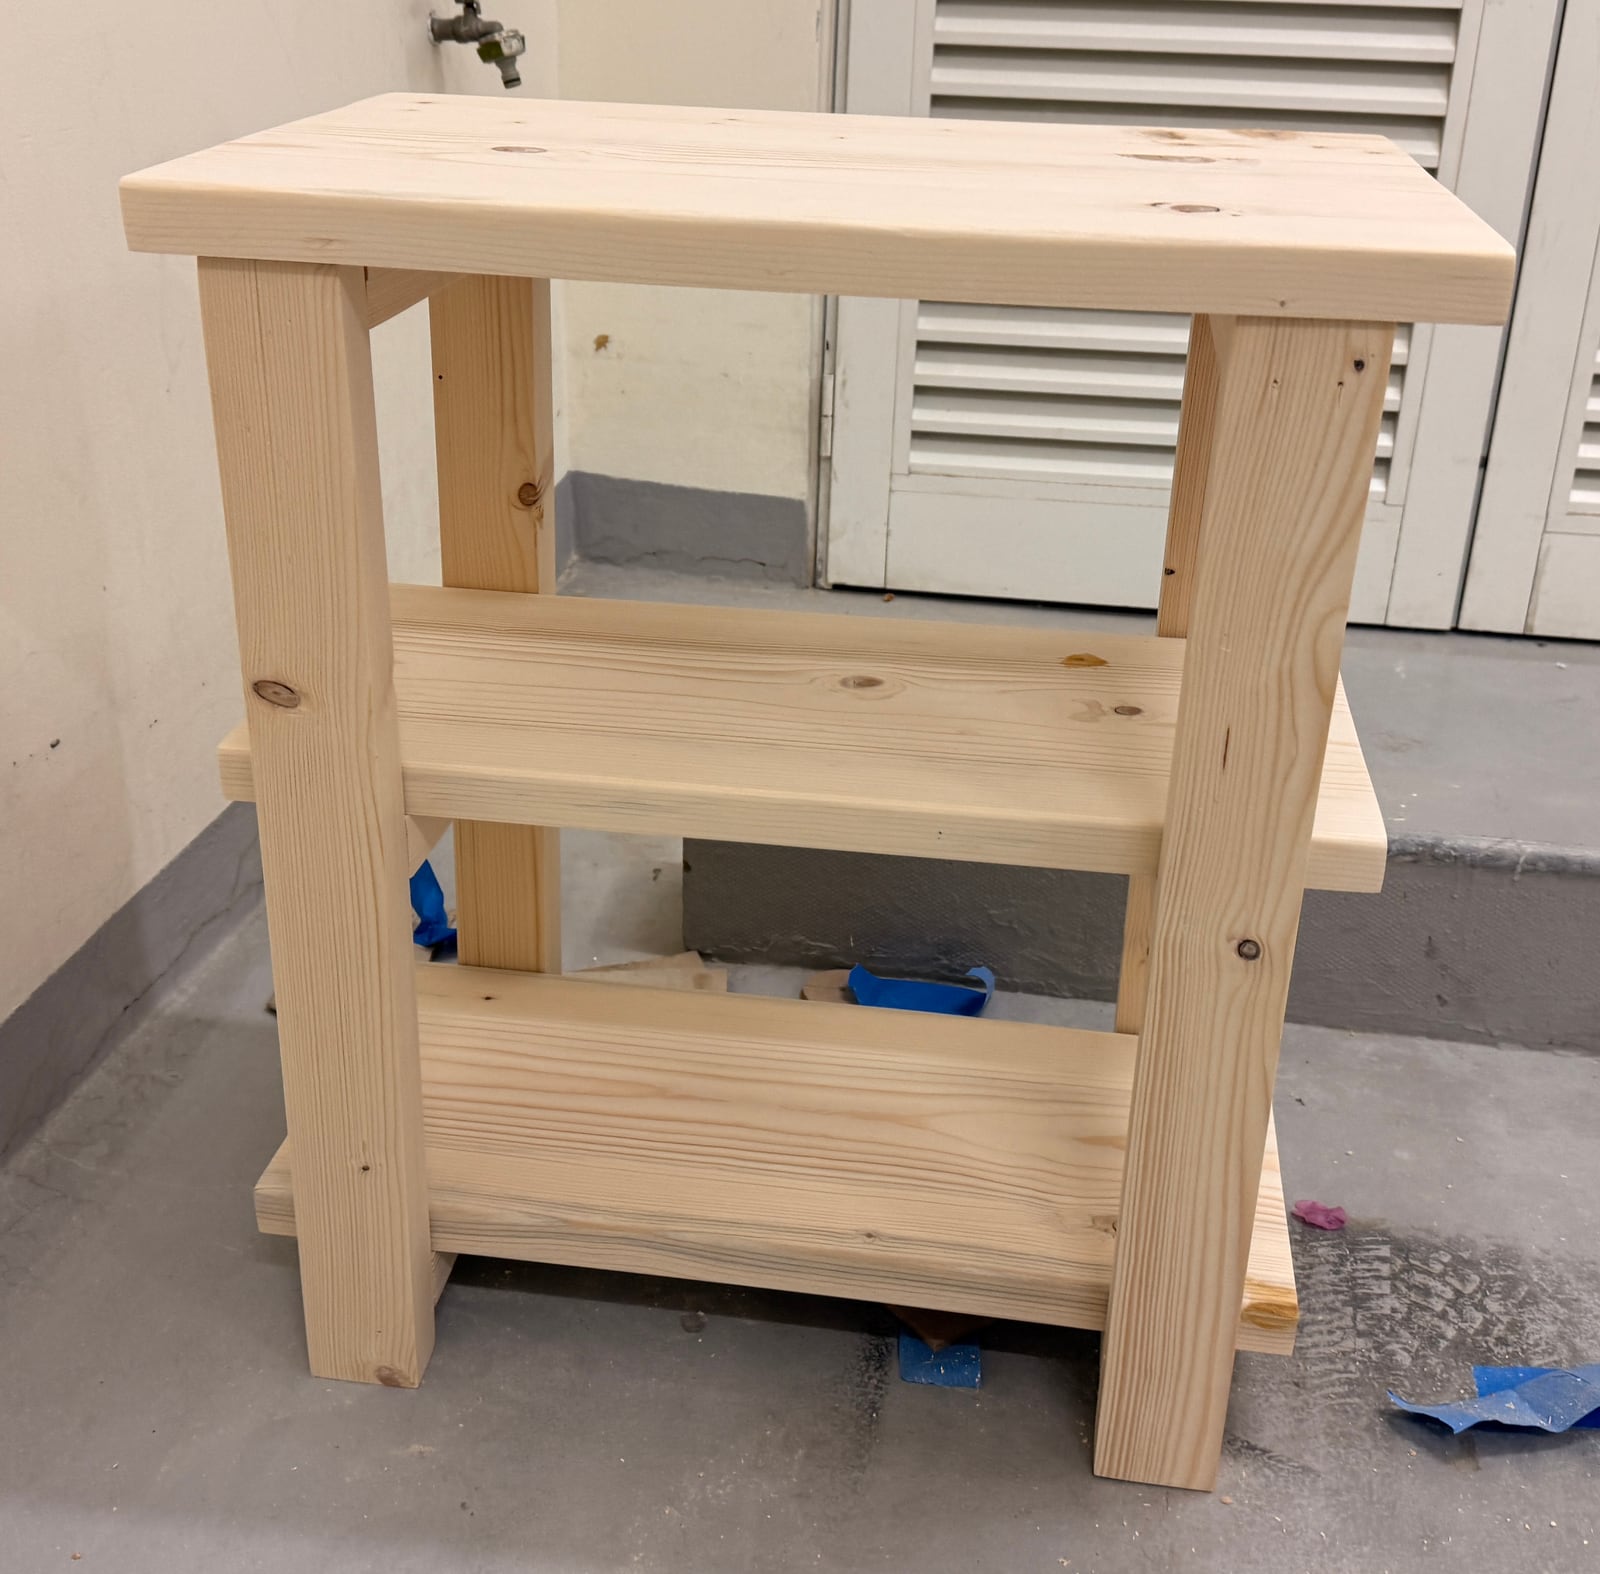
Assembled. Unfinished. Magnificent.
I was so proud. It has a shape. A table shape!
Finishing (twice)
Now, I didn't really like how the stain came out. But who am I, Cam from Blacktail Studio? I own one stain. I carried on.
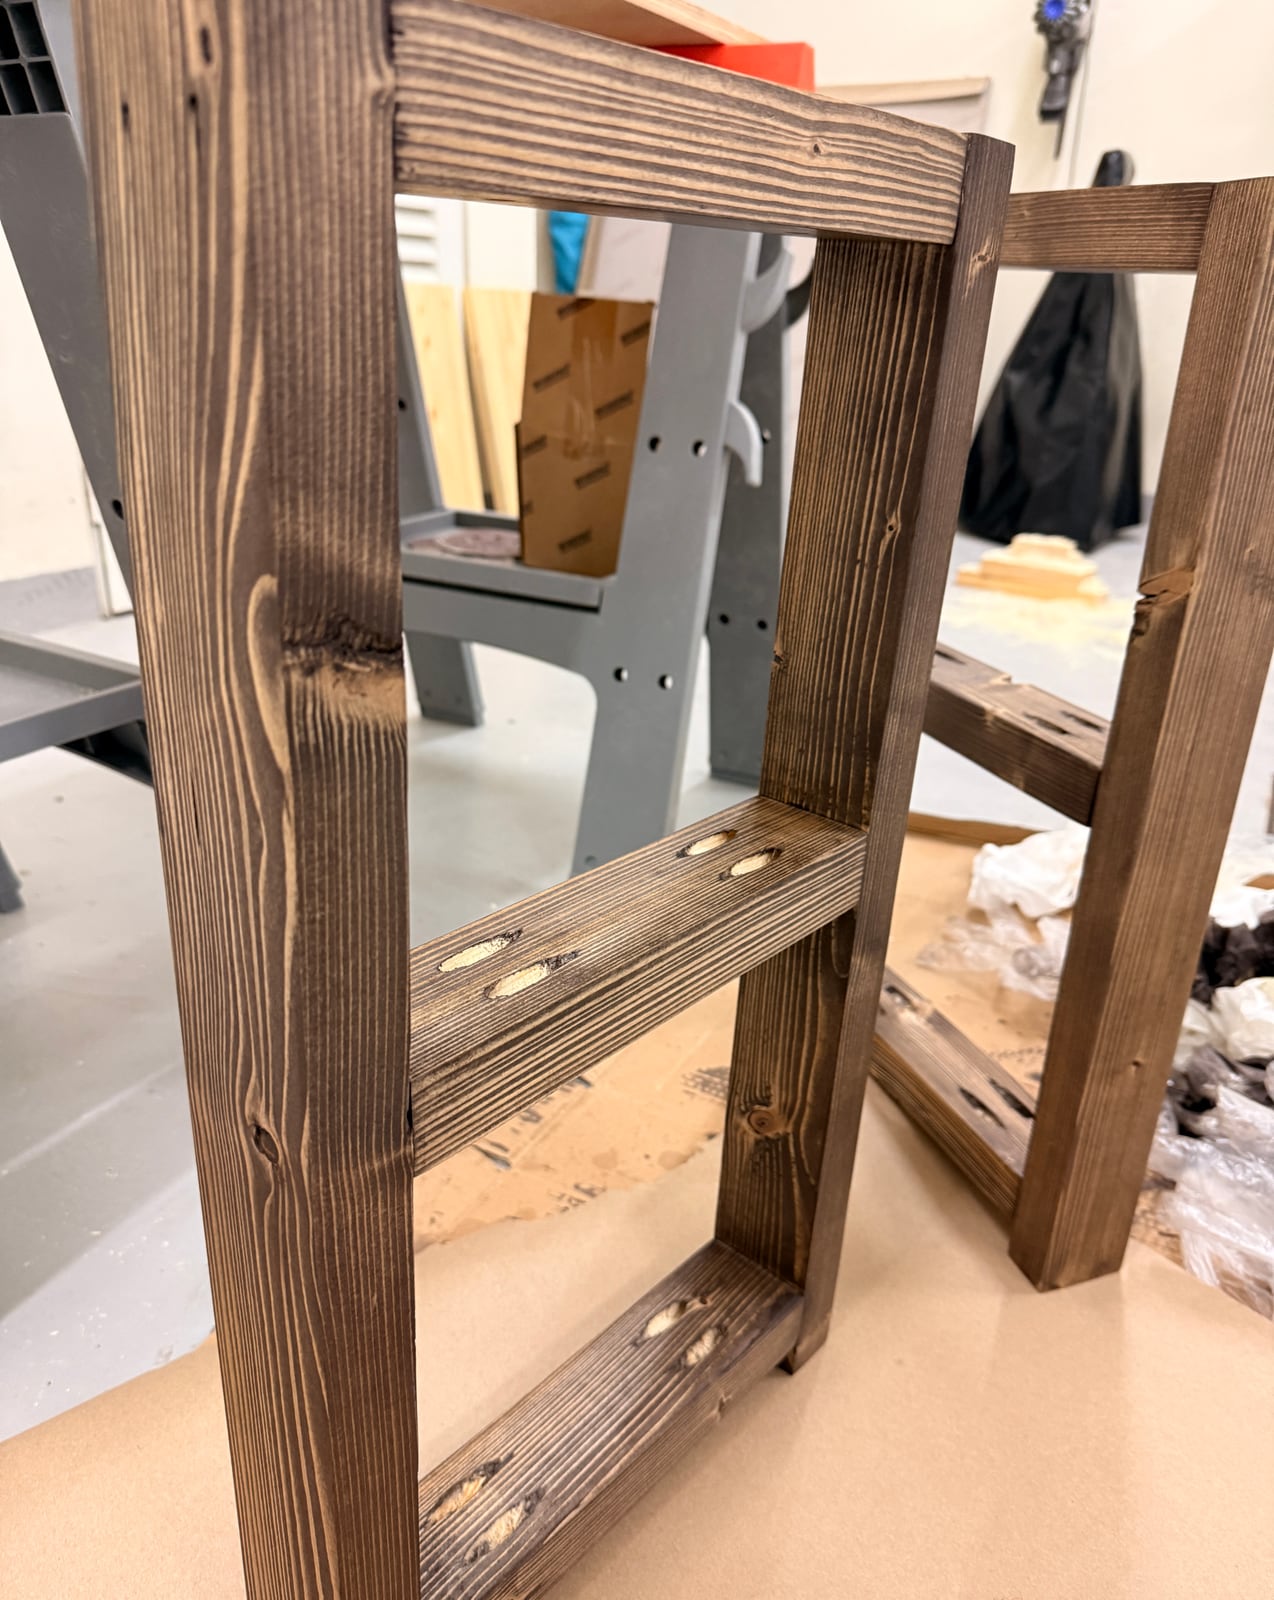
The base, stained. Opinions were formed.
Man, I really hate it. But it's my ugly finished part, so I'll love it — like a parent at a school play.
After the stain dried, I brushed on the finish, waited for it to dry, sanded it lightly like everyone suggests, and... removed all of it. Every bit. So I finished it again, scuffed it much more gently this time, and added a second coat.
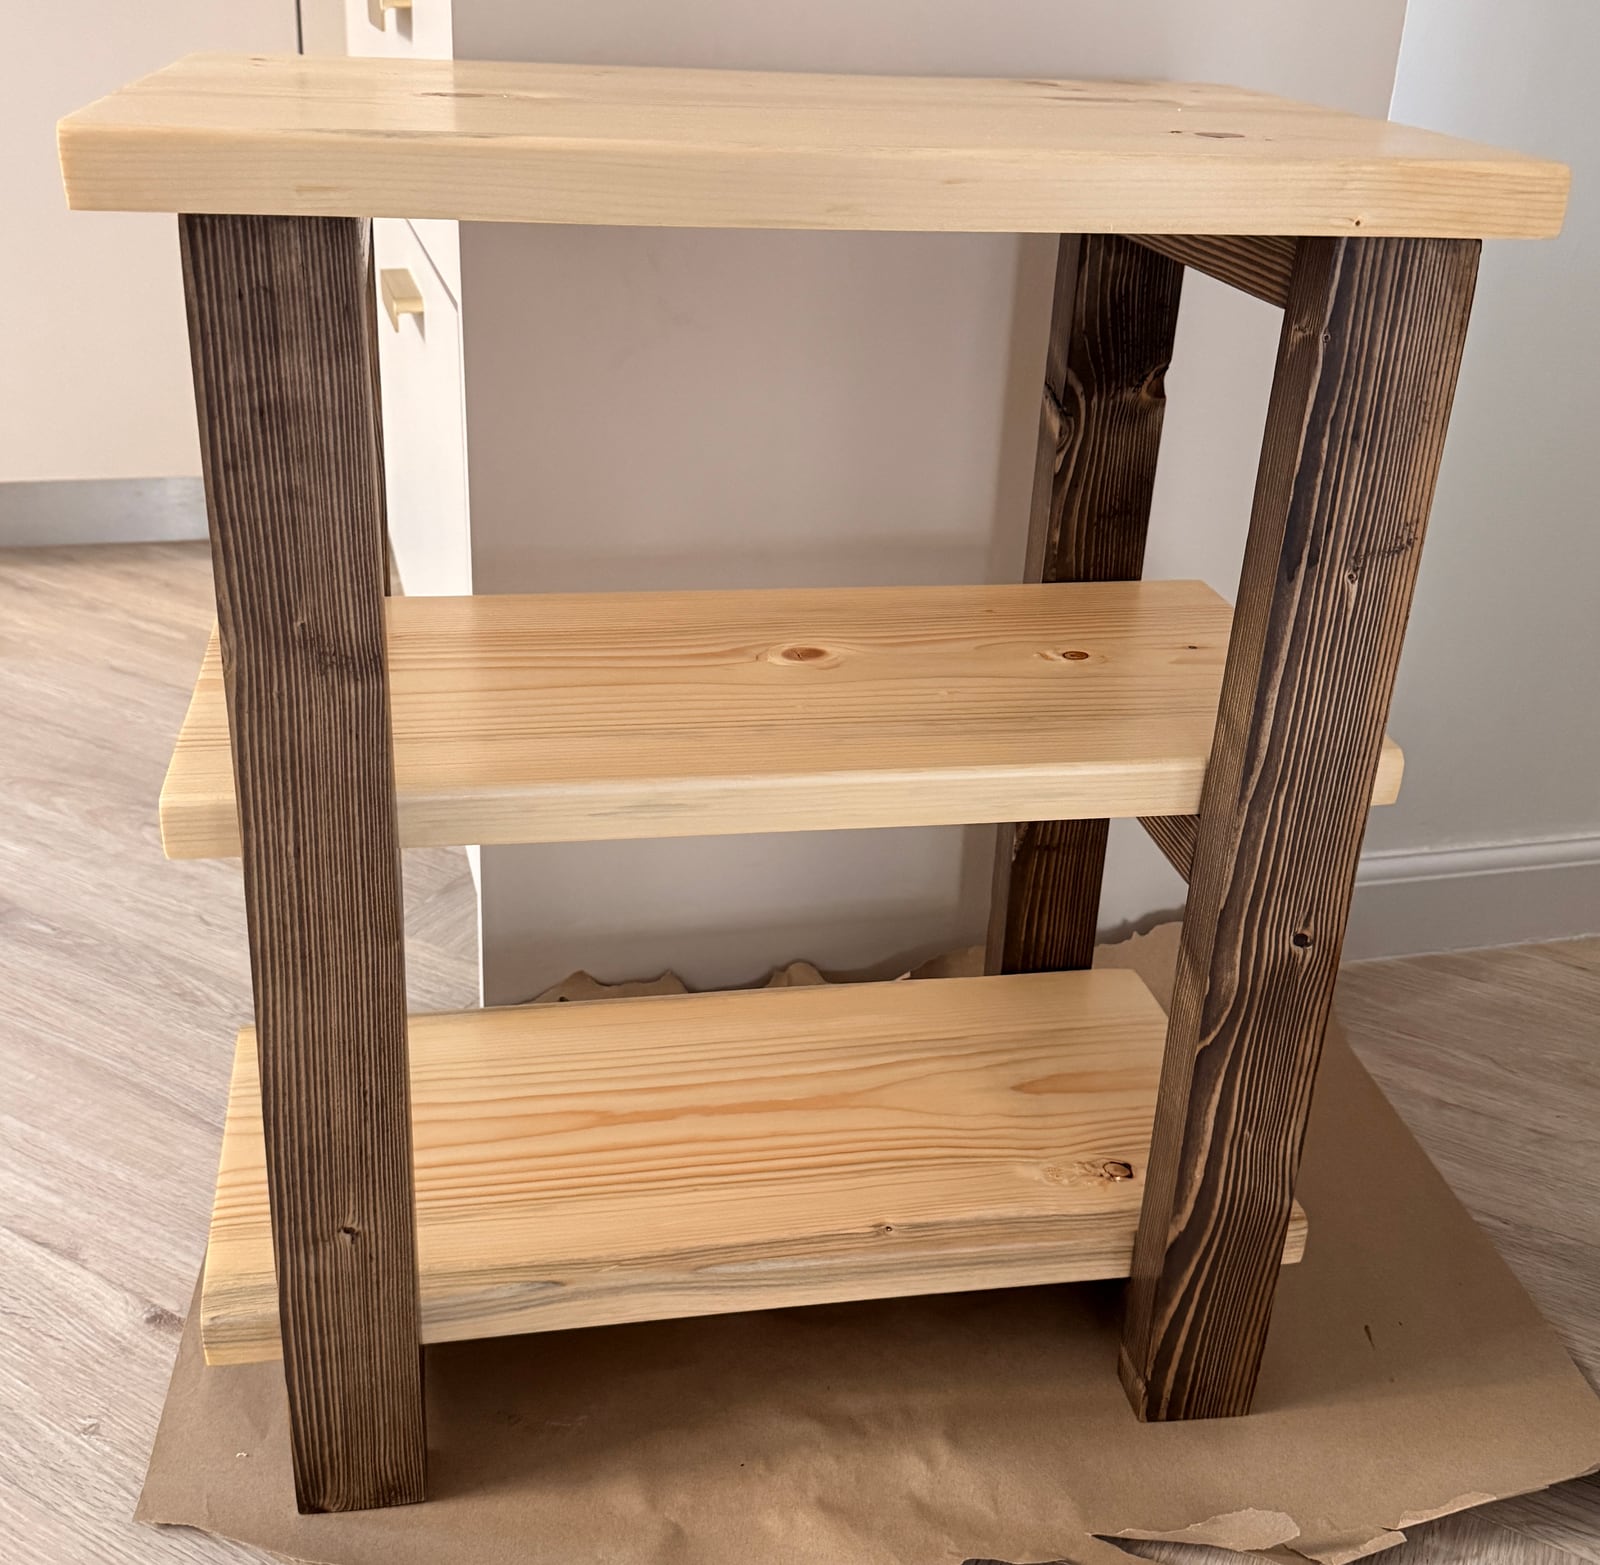
Two tones, exactly as prescribed by the Ace Hardware guy.
The finish isn't great. It doesn't feel super soft to the touch. But this was all the energy I had for this project.
Worth it?
I like it. It's useful. And even through a very messy process, I made something that works — which, for a first build, is the whole point. I'm enjoying this stuff.
My drink is off the floor. I think I now deserve that crunchy, cold Coke Zero to finish the day.
Firsts in this build
In the wiki
- Circular SawThe tool most people cut their first board with, and the one that never quite leaves the shop even after you own a table saw, track saw, and miter saw.
- Nominal SizeThe name printed on the label, not the tape measure -- a 2x4 hasn't actually measured 2 inches by 4 inches in a very long time.
- Pocket Hole JoineryAn angled, self-tapping screw joint that trades joinery elegance for speed -- the right call more often than the purists let on.
- Wood Finish (Oil vs. Film Finishes)The two fundamentally different ways a finish protects wood -- soaking in and hardening within the fibers, or building a continuous protective layer on top.